Pairing the Heat Vest

Pairing the Heat Vest
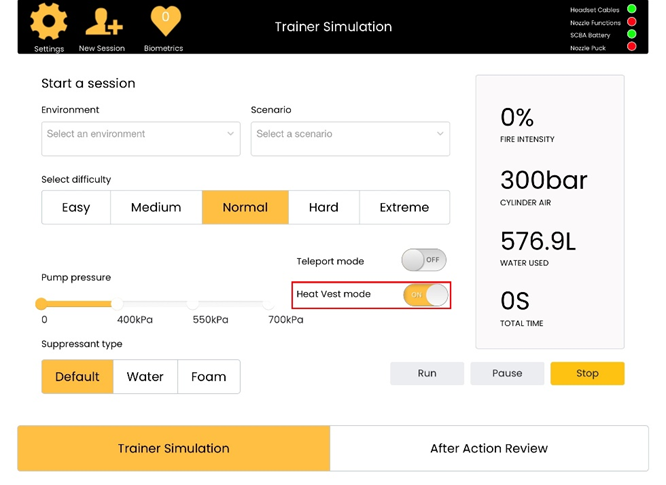
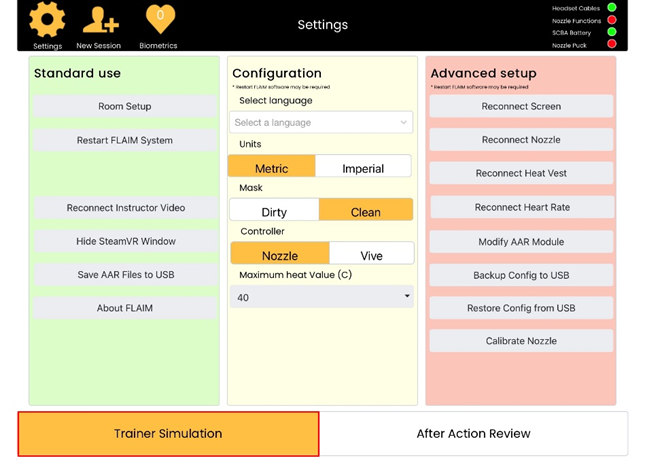
- Once the system is powered on with the Heat Vest is connected, launch the iPad app and navigate to the main facilitator screen as pictured below. Then, select the Settings cog ⚙️ icon in the top left corner of the screen.
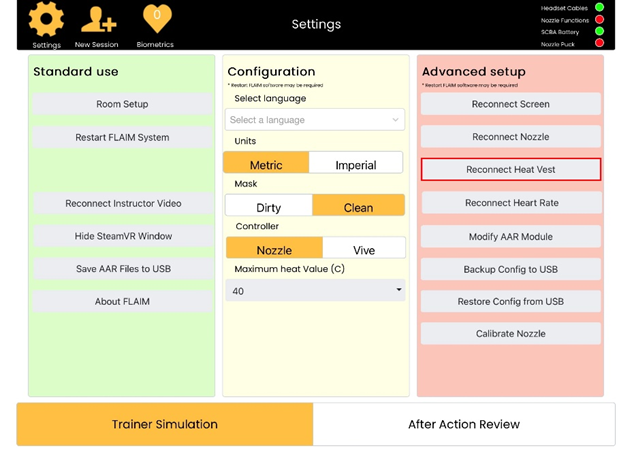
- Tap the Reconnect Heat Vest button under "Advanced Setup".
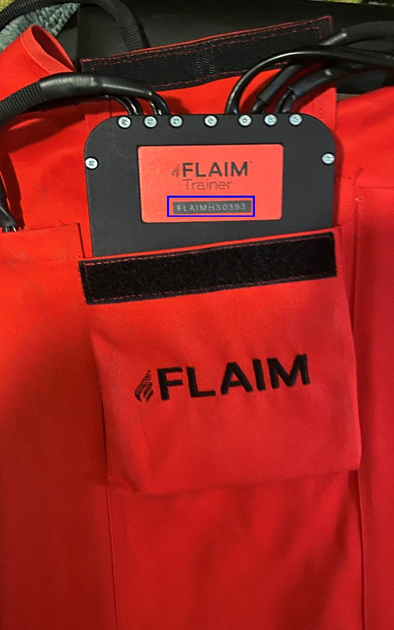
- Use the drop-down menu to locate your Heat Vest. To find the ID of the Heat Suit, check the back of the battery pack in the front pouch.
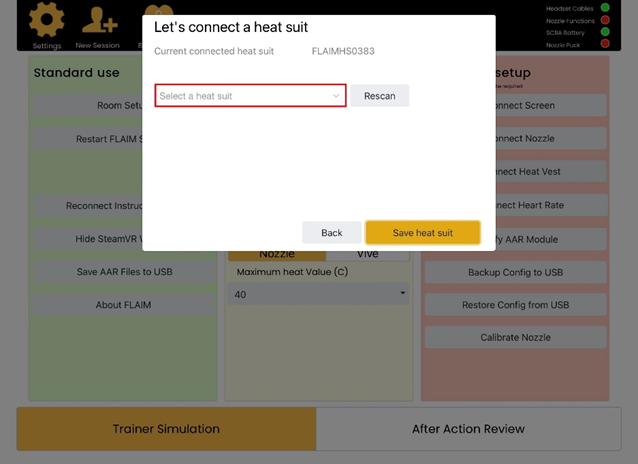

- Press Save heat suit.
- Once saved, select the Reconnect Heat Vest button again. The 'Current connected heat suit' will identify the newly connected Heat Vest. After you have confirmed that the Heat Vest is connected, tap the Back button to return to the Settings page.
- Select the Restart FLAIM System button under 'Standard Use' on the left hand side. This confirms all updates to the system. Then press the Trainer Simulation box in the bottom left hand corner.
- Once you've returned to the main facilitator screen and the TV/ Display view has rebooted, ensure that you have the Heat Vest mode enabled. .